You want to start a site. Now what?
1 Apr
If you are looking to start a site, but have no clue how, then I wrote this article just for you. Seriously. In this article, I lay out 7 steps to starting a web site from scratch.
These steps are very prescriptive. In fact, I will be recommending specific tools and services for you to use at each step. These recommendations are examples. You do not need to use the specified tools and services to accomplish each step. However, as you will notice, these tools and services are either completely free or as low cost as you can possibly find!
1. Register a domain name with GoDaddy.
Your first step is to pick and register a domain name. A domain name is your dot-com, e.g. mydomain.com. Of course, it doesn’t need to be a dot-com. It can be dot-net, dot-org, dot-asia (if that suites your fancy), etc.
I recommend registering on GoDaddy, because it’s cheap. You can always find GoDaddy coupons on Google to get a new domain name for $7.50 or less. This is a great place to check for GoDaddy coupons:
http://www.fatwallet.com/forums/hot-deals/725207/
If you are looking to get a domain name for free, we can actually make that happen. (More on that in step 2.) In that case, pick your domain name, but don’t register it yet.
To explain the importance of each step, I’m going to draw an extended analogy comparing building a website with building a physical home. Your domain name is your street address.
2. Create a hosting account with GreenGeeks.
After you register your domain name, your next step is to find a web host provider. What a web host does is rent you a computer (i.e. web server) that you can store your web site on. Going back to our analogy, your web host is like the land your house sits on. Your lot.
I recommend GreenGeeks. They are affordable, will give you a free domain, and provide “green,” eco-friendly hosting. As an environmentally and socially responsible person, this last point is particularly important. Some other features include 24/7 support, free site migration (if you’re switching hosts), and 30-day money back guarantee.
With a basic GreenGeeks account, you get unlimited disk space and unlimited bandwidth for $4.95/month, which includes a free domain. Use the coupon ‘THEMAN‘ and receive an additional $30 off. This is an exclusive coupon for readers of my blog. I spoke with GreenGeeks directly to get this deal for you! Note that the $4.95/month is based on a 3-year contract. Shorter term contracts will increase the monthly rate.
If you go with GreenGeeks, you will have your domain registration taken care of. If you already have a domain name, you can transfer it to them for free.
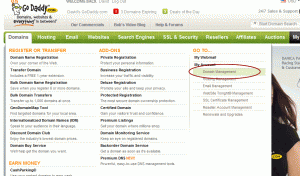
On the other hand, if you go with a different host, you will need to register your domain with GoDaddy and set your domain’s nameservers. Don’t worry, setting your domain’s nameservers is easy to do. To do this, after you’ve registered your domain with GoDaddy, log in to their site. Then, hover over the ‘DOMAIN’ tab, and click ‘Domain Management’ (on the far right column). See the screenshot below. (Click the image to view the full size.)
Next, mark the checkbox next to your domain name; click the ‘Nameservers’ icon; then click ‘Set Nameservers.’
In the pop up box, type in the following 2 values into Nameserver 1 and Nameserver 2, respectively:
ns1.YOURHOST.com
ns2.YOURHOST.com
You should verify the exact nameservers with your host.
3. Download PSPad.
Now, let’s download a text editor. A text editor is used to modify the code for your web site. You can actually use Microsoft Notepad for this, but something like PSPad is much better. Don’t worry, it’s free.
You can liken a text editor to a saw, or a power drill, or any tool used to build your home. Download PSPad here:
http://www.pspad.com/en/download.php
4. Download and modify Easy CMS (Content Management System).
Easy CMS is a Content Management System (CMS) I created just for this article. A CMS is like a pre-built web site template. It’s an out-of-the-box website. All you need to do is install it and fill in the contents.
Easy CMS was designed for the beginner It is, in fact, the only CMS that is not dependent on a database. I know setting up a database for anyone who hasn’t done it before can be a challenging, frustrating, and time-consuming process. So, let’s leave that battle for another day.
Download Easy CMS from here. Yes, it is free.
http://themanwhosoldtheweb.com/easy-cms.php
Once you have Easy CMS downloaded, you need to add your own content to it. Easy CMS is your empty house. Adding content is decorating the interior–painting the walls, carpeting the floors, adding the furniture.
To begin, open up the config.php file in PSPad. Within this file, there are a number of variables that you can modify. Each variable stores a value that you should customize for your site. All variables being with a dollar sign and all values are contained within quotes. A variable and its value are separated by an equal sign. Here is an example:
$pages[0]["nav"] = "Home";
In the above example, $pages[0][“nav”] is the variable and Home is the value. If you want to change the navigation text to read something else, just change Home to some other text.
Let’s say you website is for a clothing brand called Zephyr Jeans. Your modified config.php file may look like the following:
// choose between the directories in the "design" directory
// to download more design choices, go to http://themanwhosoldtheweb.com/easy-cms.php
$design = "citrus";
// set your domain
$domain = "zephyrjeans.com";
// site header title
$header = "Zephyr Jeans";

// PAGE 1 - modify page1.php in the "pages" directory to change the content
$pages[0]["nav"] = "Home";
$pages[0]["title"] = "Welcome to Zephyr.";

// PAGE 2 - modify page2.php in the "pages" directory to change the content
$pages[1]["nav"] = "Company History";
$pages[1]["title"] = "The story behind the jeans.";

// PAGE 3 - modify page3.php in the "pages" directory to change the content
$pages[2]["nav"] = "Women";
$pages[2]["title"] = "Browse our Women's jeans.";

// PAGE 4 - modify page4.php in the "pages" directory to change the content
$pages[3]["nav"] = "Men";
$pages[3]["title"] = "Browse our Men's jeans.";

// PAGE 5 - modify page5.php in the "pages" directory to change the content
$pages[4]["nav"] = "Contact";
$pages[4]["title"] = "We welcome your questions.";
Updating the config.php file will set the title of the website, the text in top header section of all the pages, the navigation text, as well as the title each page. To modify the content of each page, you will need to modify the files located inside the pages directory.
Inside the pages directory, you will 5 files named page1.php, page2.php, page3.php, page4.php, and page5.php. These, unsurprisingly, correspond to the 5 pages of your site. They are all structured the same. It should be pretty straightforward to modify. If you know HTML, you can insert HTML into these pages. However, knowledge of HTML is not required.
Modify the 5 pages (i.e. page1.php, page2.php, page3.php, page4.php, page5.php) accordingly.
5. Register a Google Analytics account.
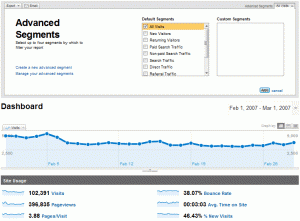
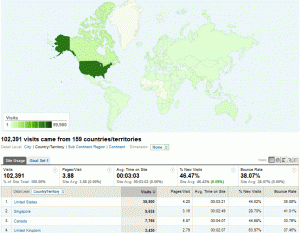
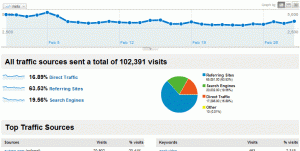
Google Analytics is a great and free web analytics tool. What does that mean exactly? It’s a service that allows you to analyze who is coming to your site and what pages they’re visiting. Check out the screenshots below for a better idea of what kind of data and insight Google Analytics provides.
If you currently use Gmail or any of Google’s other services, you can just add Google Analytics to your existing Google account. After you register with Google Analytics, click “+ Add New Profile” (located on the top right, just below the time frame buttons).
Select the default radio button “Add a Profile for a new domain” and enter in your domain information. Click the “Finish” button.
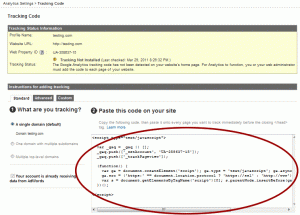
This will bring you to a page that includes code for you to paste into your web site’s source code. This code is clearly marked, but here is a screenshot for your convenience.
Copy the code in the text box, circled in red above.
In the pages directory, you will find a file named head.php. Open this document in PSPad and paste in the code from Google Analytics. Save and close this file.
6. Download Core FTP and connect to Infura.
Now that you have updated Newbie CMS with your content, you need to upload all this stuff to your web host. In other words, your house has been built, but you built it off site. You now need to take a giant crane and move your house from this off site location to your actual street address.
This giant crane is Core FTP. Core FTP is a free program that allows you to connect to your web host, Infura.
You can download Core FTP for free from here:
http://www.coreftp.com/download.html
To upload (meaning copy) anything to Infura, like your website files or anything you wish, you will need the FTP server info, your FTP username, and your FTP password. Your FTP server URL is actually your website on Infura. So for example, if your domain name is DOMAIN.COM, then your FTP url to connect to, in any FTP program, will be
ftp.domain.com
Or
domain.com
Both of those url’s will work to connect to your domain on Infura.com .
Your FTP username and password are what you used to sign up with Infura, and can be found in your welcome email. If at anytime you need to find out your username and password again, have them reset or would like to have your welcome email resent, simply contact Infura.
Once you enter those 3 pieces of information, simply click “Connect” and you’re all set!
7. Upload your web site and get it indexed with Rapid Google Indexer.
Now that you are connected to your Infura account, you can finally upload your website to the Internet! Feeling excited?
Once you are connected to your Infura account, you will see several folders. Each folder on your Infura hosting account serves a specific purpose. For you to upload your site, the folder “public_html” is what you are looking for. Anything you upload there, including the Easy CMS, will be shown publicly to the whole world.
Simply double click the “public_html” folder to navigate into it.
The way most FTP clients, including Core FTP, work is by allowing you to drag and drop files from the left window onto the right window area inside your FTP program. The left window area is your local computer, the one you installed the FTP program on. The right hand side window is your Infura Hosting account online in the internet clouds, allowing you to put files into it the way you would on your local computer.
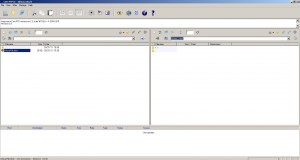
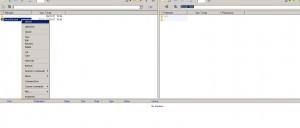
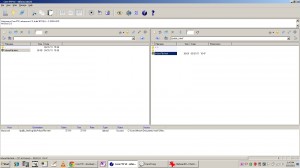
Now navigate in the left hand side menu of your Core FTP program to your local computer folder which has the files, like Easy CMS, that you want to upload. Simply select all the files, and either drag them to the right hand window into your Infura Hosting account, or right click on them and choose “Upload.” That’s it! It will take a few moments to upload all files, and you will see a status pending at the bottom or top area of your FTP client showing you the status of the upload. See the series of screenshots below.
Once the upload finishes, you’re all good to go!
Now you can share your website with the world. Just go to your domain from any browser and it should.
You are ready now for Google to find and index your web site. This means your site will actually appear in Google search results. To trigger this, just use my free Rapid Google Indexer service:
http://themanwhosoldtheweb.com/rapid-google-indexer-access.php
After you submit your domain through this tool, by the end of the day, people will be able to find your website on Google. To check, go to Google and search for the following:
site:yourdomain.com
This search will also tell you how many pages Google has indexed from your domain.
Done with all 7 steps? Congratulations. You now have your first web site up online.
Awesome. But, now what?
Now, it’s time to learn some basic Search Engine Optimization (SEO). I recommend reading the following blog posts, which are geared to the beginner audience:
dave



Dave I just want to say thanks for the info. and thanks for this site. Everything you have put here is good stuff, keep it coming.
I wonder why I’ve never heard about infura hosting. During all of my past research the main hosting platforms that I kept hearing about are hostgator and bluehost, etc. I finally settled on hostgator due to the raving reviews and so far they have been working out just fine. But I’m really surprised I didn’t hear about Infura being that it has this awesome deal at $2.95 per month and been in business since ’01.
Thanks David for the mention, and thanks Rich for the comment too.
Yes, we’ve been around for a while and focus solely on word of mouth exposure. Out entire marketing campaign consists solely of existing customers referring others. We have many clients who have run away from Hostgator and Bluehost, by the way. 🙂
Let us know if you have any questions. We will be more than happy to have you on-board!
With Infura, can you have unlimited top-level domains as well as sub-domains? With my Baby Hostgator acct you can…
With Infura, you can have 1 top-level domain and 5 sub-domains at this moment. Would that work? 🙂
Also, we’re famous for focusing on service rather than any competition. Which is why you’ll never, ever [or a rare one in 10 years] find someone dissatisfied with our service after hosting with us.